目录
- Regular Expressions 正则表达式
- Matching Regex Objects 匹配Regex对象
- Grouping with Parentheses 用括号分组
- Matching Multiple Groups with the Pipe 用管道匹配多组
- Optional Matching with the Question Mark 问号选择性匹配
- Matching Zero or More with the Star 星号匹配 0个或多个
- Matching One or More with the Plus 加号匹配 1个或多个
- Matching Specific Repetitions with Curly Brackets 打括号匹配特定的重复次数
- Greedy and Nongreedy Matching 贪婪和非贪婪匹配
- The findall() Method findall() 方法
- Making Your Own Character Classes 制作你自己的字符类
- The Caret and Dollar Sign Characters ^ 和 $
- The Wildcard Character 点号
- Matching Everything with Dot-Star 点星匹配所有
- Matching Newlines with the Dot Character 点号匹配新行
- Review of Regex Symbols Regex符号复习
- Case-Insensitive Matching 大小写敏感匹配
- Substituting Strings with the sub() Method 用 sub() 方法替换字符串
- Managing Complex Regexes 管理复杂的正则表达式
- Handling File and Directory Paths 处理文件和目录路径
- 读写文件
- JSON, YAML 和配置文件
- Debugging 调试
- Logging 日志
- Lambda Functions Lambda 函数
- args and kwargs
- Context Manager 上下文管理器
- __main__ 顶层脚本环境
- setup.py
- Dataclasses 数据类
- Virtual Environment 虚拟环境
Regular Expressions 正则表达式
- Import the regex module with import re.
- Create a Regex object with the re.compile() function. (Remember to use a raw string.)
- Pass the string you want to search into the Regex object’s search() method. This returns a Match object.
- Call the Match object’s group() method to return a string of the actual matched text.
- 用import re导入regex模块。
- 调用 re.compile() 函数先用正则表达式字符串构造一个 Regex 对象。
- 调用 Regex对象的search()方法,将目标字符串传入,返回一个 Match 对象。
- 调用 Match 对象的 group() 方法来返回一个实际匹配的文本字符串。
其实就是,然后用 regex 对象搜索目标字符串返回一个 Match对象。 Match 对象的 group() 方法返回实际匹配到的
All the regex functions in Python are in the re module: Python 中所有的 regex 函数都在 re 模块中。
>>> import re
Matching Regex Objects 匹配Regex对象
>>> phone_num_regex = re.compile(r'\d\d\d-\d\d\d-\d\d\d\d')
>>> mo = phone_num_regex.search('My number is 415-555-4242.')
>>> print('Phone number found: {}'.format(mo.group()))
Phone number found: 415-555-4242
Grouping with Parentheses 用括号分组
>>> phone_num_regex = re.compile(r'(\d\d\d)-(\d\d\d-\d\d\d\d)')
>>> mo = phone_num_regex.search('My number is 415-555-4242.')
>>> mo.group(1)
'415'
>>> mo.group(2)
'555-4242'
>>> mo.group(0)
'415-555-4242'
>>> mo.group()
'415-555-4242'
To retrieve all the groups at once: use the groups() method—note the plural form for the name. 要一次性检索所有的 groups:使用 groups() 方法--注意名称的复数形式。
>>> mo.groups()
('415', '555-4242')
>>> area_code, main_number = mo.groups()
>>> print(area_code)
415
>>> print(main_number)
555-4242
Matching Multiple Groups with the Pipe 用管道匹配多组
The | character is called a pipe. 这个字符叫做管道。 You can use it anywhere you want to match one of many expressions. For example, the regular expression r'Batman|Tina Fey' will match either 'Batman' or 'Tina Fey'. 你可以在任何地方使用它来匹配许多表达式中的一个。例如,正则表达式 r'Batman|Tina Fey' 将匹配 'Batman' 或 'Tina Fey'。
>>> hero_regex = re.compile (r'Batman|Tina Fey')
>>> mo1 = hero_regex.search('Batman and Tina Fey.')
>>> mo1.group()
'Batman'
>>> mo2 = hero_regex.search('Tina Fey and Batman.')
>>> mo2.group()
'Tina Fey'
You can also use the pipe to match one of several patterns as part of your regex: 你也可以使用管道来匹配几个模式中的一个作为你的regex的一部分。
>>> bat_regex = re.compile(r'Bat(man|mobile|copter|bat)')
>>> mo = bat_regex.search('Batmobile lost a wheel')
>>> mo.group()
'Batmobile'
>>> mo.group(1)
'mobile'
Optional Matching with the Question Mark 问号选择性匹配
The ? character flags the group that precedes it as an optional part of the pattern.
? 字符前面的 group 是作为 pattern 的可选部分。
>>> bat_regex = re.compile(r'Bat(wo)?man')
>>> mo1 = bat_regex.search('The Adventures of Batman')
>>> mo1.group()
'Batman'
>>> mo2 = bat_regex.search('The Adventures of Batwoman')
>>> mo2.group()
'Batwoman'
Matching Zero or More with the Star 星号匹配 0个或多个
The * (called the star or asterisk) means “match zero or more”— the group that precedes the star can occur any number of times in the text.
星号的意思是 "匹配 0 个或更多" 星号前面的 group 可以出现任意次数。
>>> bat_regex = re.compile(r'Bat(wo)*man')
>>> mo1 = bat_regex.search('The Adventures of Batman')
>>> mo1.group()
'Batman'
>>> mo2 = bat_regex.search('The Adventures of Batwoman')
>>> mo2.group()
'Batwoman'
>>> mo3 = bat_regex.search('The Adventures of Batwowowowoman')
>>> mo3.group()
'Batwowowowoman'
Matching One or More with the Plus 加号匹配 1个或多个
While * means “match zero or more,” the + (or plus) means “match one or more”. The group preceding a plus must appear at least once. It is not optional: * 表示 "匹配 0个或更多",而+(或加号)表示 "匹配一个或多个"。 加号前面的 group 必须至少出现一次。它不是可选的。
>>> bat_regex = re.compile(r'Bat(wo)+man')
>>> mo1 = bat_regex.search('The Adventures of Batwoman')
>>> mo1.group()
'Batwoman'
>>> mo2 = bat_regex.search('The Adventures of Batwowowowoman')
>>> mo2.group()
'Batwowowowoman'
>>> mo3 = bat_regex.search('The Adventures of Batman')
>>> mo3 is None
True
Matching Specific Repetitions with Curly Brackets 打括号匹配特定的重复次数
If you have a group that you want to repeat a specific number of times, follow the group in your regex with a number in curly brackets. For example, the regex (Ha){3} will match the string 'HaHaHa', but it will not match 'HaHa', since the latter has only two repeats of the (Ha) group.
如果你有一个想重复特定的次数的 group。在你的regex中,用大括号中的数字跟在 group 后面。比如说: regex (Ha){3} 将匹配字符串'HaHaHa',但不匹配'HaHa'。因为后者只有两个重复的(Ha)group。
Instead of one number, you can specify a range by writing a minimum, a comma, and a maximum in between the curly brackets. For example, the regex (Ha){3,5} will match 'HaHaHa', 'HaHaHaHa', and 'HaHaHaHaHa'.
可以用 {min,max} 指明出现次数的范围。例如:(Ha){3,5} 匹配 'HaHaHa' 'HaHaHaHa' 和 'HaHaHaHaHa'
>>> ha_regex = re.compile(r'(Ha){3}')
>>> mo1 = ha_regex.search('HaHaHa')
>>> mo1.group()
'HaHaHa'
>>> mo2 = ha_regex.search('Ha')
>>> mo2 is None
True
Greedy and Nongreedy Matching 贪婪和非贪婪匹配
Python’s regular expressions are greedy by default, which means that in ambiguous situations they will match the longest string possible.
The non-greedy version of the curly brackets, which matches the shortest string possible, has the closing curly bracket followed by a question mark.
Python的正则表达式默认是贪婪的。这意味着,在不明确的情况下,它们将匹配最长的字符串。 非贪婪匹配大括号后面有一个 ?,它匹配最短的字符串。
>>> greedy_ha_regex = re.compile(r'(Ha){3,5}')
>>> mo1 = greedy_ha_regex.search('HaHaHaHaHa')
>>> mo1.group()
'HaHaHaHaHa'
>>> nongreedy_ha_regex = re.compile(r'(Ha){3,5}?')
>>> mo2 = nongreedy_ha_regex.search('HaHaHaHaHa')
>>> mo2.group()
'HaHaHa'
The findall() Method findall() 方法
In addition to the search() method, Regex objects also have a findall() method. While search() will return a Match object of the first matched text in the searched string, the findall() method will return the strings of every match in the searched string.
除了 search() 方法之外,Regex对象还有一个findall()方法。 search() 方法返回搜索字符串中第一个匹配的文本的匹配对象。findall() 方法将返回所有匹配的字符串.
>>> phone_num_regex = re.compile(r'\d\d\d-\d\d\d-\d\d\d\d') # has no groups
>>> phone_num_regex.findall('Cell: 415-555-9999 Work: 212-555-0000')
['415-555-9999', '212-555-0000']
To summarize what the findall() method returns, remember the following: 为了总结一下findall()方法返回什么,请记住以下几点。
- When called on a regex with no groups, such as d-ddd-dddd, the method findall() returns a list of ng matches, such as ['415-555-9999', '212-555-0000'].
- regex 无 group 的时候,findall() 返回如 ['415-555-9999', '212-555-0000']
- When called on a regex that has groups, such as (ddd)-(dd)-(dddd), the method findall() returns a list of es of strings (one string for each group), such as [('415', ', '9999'), ('212', '555', '0000')].
- regex 有 group 的时候,findall() 返回如 [('415', ', '9999'), ('212', '555', '0000')]
Making Your Own Character Classes 制作你自己的字符类
There are times when you want to match a set of characters but the shorthand character classes (d, w, s, and so on) are too broad. You can define your own character class using square brackets. For example, the character class [aeiouAEIOU] will match any vowel, both lowercase and uppercase.
有的时候,你想匹配一组字符的时候 但是速记字符类(d、w、s等)太宽泛了。你可以用方括号定义自己的字符类。 例如,字符类 [aeiouAEIOU] 将匹配任何元音。小写和大写都可以。
>>> vowel_regex = re.compile(r'[aeiouAEIOU]')
>>> vowel_regex.findall('Robocop eats baby food. BABY FOOD.')
['o', 'o', 'o', 'e', 'a', 'a', 'o', 'o', 'A', 'O', 'O']
You can also include ranges of letters or numbers by using a hyphen. For example, the character class [a-zA-Z0-9] will match all lowercase letters, uppercase letters, and numbers.
你也可以用 连字符 来包含字母或数字的范围。例如字符类 [a-zA-Z0-9] 将匹配所有小写字母、大写字母和数字。
By placing a caret character (^) just after the character class’s opening bracket, you can make a negative character class. A negative character class will match all the characters that are not in the character class.
通过在字符类的起始括号后放置一个小括号(^)。你可以制作一个负字符类。负字符类将匹配所有不在字符类中的字符。
For example, enter the following into the interactive shell: 例如,在交互式shell中输入以下内容。
>>> consonant_regex = re.compile(r'[^aeiouAEIOU]')
>>> consonant_regex.findall('Robocop eats baby food. BABY FOOD.')
['R', 'b', 'c', 'p', ' ', 't', 's', ' ', 'b', 'b', 'y', ' ', 'f', 'd', '.', '
', 'B', 'B', 'Y', ' ', 'F', 'D', '.']
The Caret and Dollar Sign Characters ^ 和 $
You can also use the caret symbol (^) at the start of a regex to indicate that a match must occur at the beginning of the searched text.
你也可以在regex的开头使用小括号(^)来表示匹配必须出现在搜索到的文本的开头。
Likewise, you can put a dollar sign ($) at the end of the regex to indicate the string must end with this regex pattern.
同样的,你可以在regex的末尾加上一个美元符号($)来表示该字符串必须以这个regex模式结尾。
And you can use the ^ and $ together to indicate that the entire string must match the regex—that is, it’s not enough for a match to be made on some subset of the string.
而且你可以用 ^ 和 $ 一起表示 整个 字符串中的必须与 regex 匹配而不只是字符串的一些子集。
The r'^Hello' regular expression string matches strings that begin with 'Hello':
r'^Hello'正则表达式字符串匹配以'Hello'开头的字符串。
>>> begins_with_hello = re.compile(r'^Hello')
>>> begins_with_hello.search('Hello world!')
<_sre.SRE_Match object; span=(0, 5), match='Hello'>
>>> begins_with_hello.search('He said hello.') is None
True
The r'd$' regular expression string matches strings that end with a numeric character from 0 to 9:
r'd$' 正则表达式字符串匹配以数字字符结尾的字符串:
>>> whole_string_is_num = re.compile(r'^\d+$')
>>> whole_string_is_num.search('1234567890')
<_sre.SRE_Match object; span=(0, 10), match='1234567890'>
>>> whole_string_is_num.search('12345xyz67890') is None
True
>>> whole_string_is_num.search('12 34567890') is None
True
The Wildcard Character 点号
The . (or dot) character in a regular expression is called a wildcard and will match any character except for a newline: 正则表达式中的 .(或点)字符被称为通配符,并将匹配任何字符,但换行符除外。
>>> at_regex = re.compile(r'.at')
>>> at_regex.findall('The cat in the hat sat on the flat mat.')
['cat', 'hat', 'sat', 'lat', 'mat']
Matching Everything with Dot-Star 点星匹配所有
>>> name_regex = re.compile(r'First Name: (.*) Last Name: (.*)')
>>> mo = name_regex.search('First Name: Al Last Name: Sweigart')
>>> mo.group(1)
'Al'
>>> mo.group(2)
'Sweigart'
The dot-star uses greedy mode:
点星使用贪婪模式。
- It will always try to match as much text as possible.
- 它总是会尽可能多地匹配文本。
- To match any and all text in a nongreedy fashion, use the dot, star, and question mark (.*?).
- 要以非贪婪的方式匹配任何和所有文本,请使用点、星形和问号 (.*?)。
- The question mark tells Python to match in a nongreedy way:
- 问号告诉 Python 要以 非贪婪 的方式进行匹配。
>>> nongreedy_regex = re.compile(r'<.*?>')
>>> mo = nongreedy_regex.search('<To serve man> for dinner.>')
>>> mo.group()
'<To serve man>'
>>> greedy_regex = re.compile(r'<.*>')
>>> mo = greedy_regex.search('<To serve man> for dinner.>')
>>> mo.group()
'<To serve man> for dinner.>'
Matching Newlines with the Dot Character 点号匹配新行
The dot-star will match everything except a newline. By passing re.DOTALL as the second argument to re.compile(), you can make the dot character match all characters, including the newline character:
点星将匹配除了换行之外的所有内容。通过将 re.DOTALL 作为第二个参数传递给re.compile(), 你可以让点字符匹配所有字符,包括换行字符。
>>> no_newline_regex = re.compile('.*')
>>> no_newline_regex.search('Serve the public trust.\nProtect the innocent.\nUphold the law.').group()
'Serve the public trust.'
>>> newline_regex = re.compile('.*', re.DOTALL)
>>> newline_regex.search('Serve the public trust.\nProtect the innocent.\nUphold the law.').group()
'Serve the public trust.\nProtect the innocent.\nUphold the law.'
Review of Regex Symbols Regex符号复习
Symbol      Matche
?   zero or one of the preceding group.
*   zero or more of the preceding group.
+   one or more of the preceding group.
{n} exactly n of the preceding group.
{n,}        n or more of the preceding group.
{,m}        0 to m of the preceding group.
{n,m}       at least n and at most m of the preceding p.
{n,m}? or *? or +?  performs a nongreedy match of the preceding p.
^spam       means the string must begin with spam.
spam$       means the string must end with spam.
.   any character, except newline characters.
\d, \w, and \s      a digit, word, or space character, ectively.
\D, \W, and \S      anything except a digit, word, or space acter, respectively.
[abc]       any character between the brackets (such as a, b, ).
[^abc]      any character that isn’t between the brackets.
Case-Insensitive Matching 大小写敏感匹配
To make your regex case-insensitive, you can pass re.IGNORECASE or re.I as a second argument to re.compile():
要使你的regex不区分大小写,你可以传递 re.IGNORECASE 或 re.I 作为第二个参数给 re.compile():
>>> robocop = re.compile(r'robocop', re.I)
>>> robocop.search('Robocop is part man, part machine, all cop.').group()
'Robocop'
>>> robocop.search('ROBOCOP protects the innocent.').group()
'ROBOCOP'
>>> robocop.search('Al, why does your programming book talk about robocop so much?').group()
'robocop'
Substituting Strings with the sub() Method 用 sub() 方法替换字符串
The sub() method for Regex objects is passed two arguments:
- The first argument is a string to replace any matches.
- The second is the string for the regular expression.
- The sub() method returns a string with the substitutions applied:
Regex对象的 sub() 方法接受两个参数。
第一个参数是一个字符串,用于替换任何匹配的字符串。
第二个参数是正则表达式的字符串。
sub()方法返回一个带有替换的字符串。
>>> names_regex = re.compile(r'Agent \w+')
>>> names_regex.sub('CENSORED', 'Agent Alice gave the secret documents to Agent Bob.')
'CENSORED gave the secret documents to CENSORED.'
Another example:
>>> agent_names_regex = re.compile(r'Agent (\w)\w*')
>>> agent_names_regex.sub(r'\1****', 'Agent Alice told Agent Carol that Agent Eve knew Agent Bob was a double agent.')
A\*\*\*\* told C\*\*\*\* that E\*\*\*\* knew B\*\*\*\* was a double agent.'
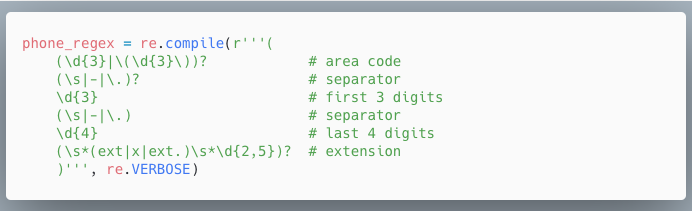
Managing Complex Regexes 管理复杂的正则表达式
To tell the re.compile() function to ignore whitespace and comments inside the regular expression string, “verbose mode” can be enabled by passing the variable re.VERBOSE as the second argument to re.compile().
要告诉 re.compile() 函数忽略在正则表达式字符串中的 空格 和 注释, "verbose模式 "可以通过传递变量 re.VERBOSE作为re.compile()的第二个参数。
Now instead of a hard-to-read regular expression like this:
现在不再是这样的难读的正则表达式了。

you can spread the regular expression over multiple lines with comments like this:
可以用这样的注释将正则表达式扩展到多行。
Handling File and Directory Paths 处理文件和目录路径
There are two main modules in Python that deals with path manipulation. One is the os.path module and the other is the pathlib module. The pathlib module was added in Python 3.4, offering an object-oriented way to handle file system paths.
Python 中有两个主要的模块处理路径操作。一个是 os.path 模块,另一个是 pathlib 模块。 pathlib 模块是在 Python 3.4 中添加的,它提供了一种面向对象的方式来处理文件系统路径。
Windows 中的反斜杠和 OS X & Linux 中的正斜杠
Backslash on Windows and Forward Slash on OS X and Linux
On Windows, paths are written using backslashes () as the separator between folder names. On Unix based operating system such as macOS, Linux, and BSDs, the forward slash (/) is used as the path separator. Joining paths can be a headache if your code needs to work on different platforms.
在Windows系统中,路径使用反斜杠()作为文件夹名称之间的分隔符。 在基于Unix的操作系统上,例如 macOS、Linux 和 BSD,路径之间使用前斜线(/)作为路径分隔符。 如果你的代码需要在不同的平台上工作,那么连接路径可能是一个令人头疼的问题。
Fortunately, Python provides easy ways to handle this. We will showcase how to deal with this with both os.path.join and pathlib.Path.joinpath
幸运的是,Python 提供了简单的方法来处理这个问题。 我们将展示如何使用 os.path.join 和 pathlib.Path.joinpath 来处理这个问题。
Using os.path.join on Windows: 在 Windows 下使用 os.path.join
>>> import os

>>> os.path.join('usr', 'bin', 'spam')
'usr\\bin\\spam'
And using pathlib on *nix: 在 *nix 下使用 pathlib
>>> from pathlib import Path

>>> print(Path('usr').joinpath('bin').joinpath('spam'))
usr/bin/spam
pathlib also provides a shortcut to join path using the / operator: pathlib 用 / 操作符来作为 joinpath 的快捷方式
>>> from pathlib import Path

>>> print(Path('usr') / 'bin' / 'spam')
usr/bin/spam
Notice the path separator is different between Windows and Unix based operating system, that's why you want to use one of the above methods instead of adding strings together to join paths together.
注意,基于Windows和基于Unix的操作系统的路径分隔符是不一样的,这就是为什么你要使用上述方法中的一种, 而不是通过把字符串加在一起,把路径连接在一起。
Joining paths is helpful if you need to create different file paths under the same directory. 如果你需要在同一个目录下创建不同的文件路径,joinpath 是很有帮助的。
Using os.path.join on Windows: 在 Windows 中使用 os.path.join。
>>> my_files = ['accounts.txt', 'details.csv', 'invite.docx']

>>> for filename in my_files:
>>>     print(os.path.join('C:\\Users\\asweigart', filename))
C:\Users\asweigart\accounts.txt
C:\Users\asweigart\details.csv
C:\Users\asweigart\invite.docx
Using pathlib on *nix: 在 *nix 上使用 pathlib:
>>> my_files = ['accounts.txt', 'details.csv', 'invite.docx']
>>> home = Path.home()
>>> for filename in my_files:
>>>     print(home / filename)
/home/asweigart/accounts.txt
/home/asweigart/details.csv
/home/asweigart/invite.docx
当前工作目录
The Current Working Directory
Using os on Windows: 在Windows上使用os
>>> import os

>>> os.getcwd()
'C:\\Python34'
>>> os.chdir('C:\\Windows\\System32')

>>> os.getcwd()
'C:\\Windows\\System32'
Using pathlib on *nix: 在*nix上使用pathlib:
>>> from pathlib import Path
>>> from os import chdir

>>> print(Path.cwd())
/home/asweigart

>>> chdir('/usr/lib/python3.6')
>>> print(Path.cwd())
/usr/lib/python3.6
创建新文件夹
Creating New Folders
Using os on Windows:
>>> import os
>>> os.makedirs('C:\\delicious\\walnut\\waffles')
Using pathlib on *nix:
>>> from pathlib import Path
>>> cwd = Path.cwd()
>>> (cwd / 'delicious' / 'walnut' / 'waffles').mkdir()
Traceback (most recent call last):
File "<stdin>", line 1, in <module>
File "/usr/lib/python3.6/pathlib.py", line 1226, in mkdir
    self._accessor.mkdir(self, mode)
File "/usr/lib/python3.6/pathlib.py", line 387, in wrapped
    return strfunc(str(pathobj), *args)
FileNotFoundError: [Errno 2] No such file or directory: '/home/asweigart/delicious/walnut/waffles'
Oh no, we got a nasty error! The reason is that the 'delicious' directory does not exist, so we cannot make the 'walnut' and the 'waffles' directories under it. To fix this, do:
我们得到了一个讨厌的错误! 原因是 'delicious' 目录不存在。 所以我们不能在它下面新建 'walnut'和 'waffles' 目录。 要解决这个问题,可以这样做。
>>> from pathlib import Path
>>> cwd = Path.cwd()
>>> (cwd / 'delicious' / 'walnut' / 'waffles').mkdir(parents=True)
And all is good :) 一切都很好:)
相对路径和绝对路径
Absolute vs. Relative Paths
There are two ways to specify a file path.
- An absolute path, which always begins with the root folder
- A relative path, which is relative to the program’s current working directory
- There are also the dot (.) and dot-dot (..) folders. These are not real folders but special names that can be used in a path. A single period (“dot”) for a folder name is shorthand for “this directory.” Two periods (“dot-dot”) means “the parent folder.”
- 绝对路径,它总是以根目录开头的
- 相对路径,是相对于程序当前工作目录的相对路径
- 还有dot(.)和dot-dot(..)文件夹。这些不是真正的文件夹,而是可以在路径中使用的特殊名称。
处理相对路径和绝对路径
Handling Absolute and Relative Paths
To see if a path is an absolute path: 查看一个路径是否是绝对路径
Using os.path on *nix:
>>> import os
>>> os.path.isabs('/')
True
>>> os.path.isabs('..')
False
Using pathlib on *nix:
>>> from pathlib import Path
>>> Path('/').is_absolute()
True
>>> Path('..').is_absolute()
False
You can extract an absolute path with both os.path and pathlib 你可以用 os.path 和 pathlib 提取绝对路径。
Using os.path on *nix:
>>> import os
>>> os.getcwd()
'/home/asweigart'
>>> os.path.abspath('..')
'/home'
Using pathlib on *nix:
from pathlib import Path
print(Path.cwd())
/home/asweigart
print(Path('..').resolve())
/home
You can get a relative path from a starting path to another path. 你可以从一个起始路径到另一个路径得到一个相对路径。
Using os.path on *nix:
>>> import os
>>> os.path.relpath('/etc/passwd', '/')
'etc/passwd'
Using pathlib on *nix:
>>> from pathlib import Path
>>> print(Path('/etc/passwd').relative_to('/'))
etc/passwd
检查路径有效性
Checking Path Validity
Checking if a file/directory exists: 检查一个文件/目录是否存在。
Using os.path on *nix:
import os
>>> os.path.exists('.')
True
>>> os.path.exists('setup.py')
True
>>> os.path.exists('/etc')
True
>>> os.path.exists('nonexistentfile')
False
Using pathlib on *nix:
from pathlib import Path
>>> Path('.').exists()
True
>>> Path('setup.py').exists()
True
>>> Path('/etc').exists()
True
>>> Path('nonexistentfile').exists()
False
Checking if a path is a file: 检查一个路径是否是文件。
Using os.path on *nix:
>>> import os
>>> os.path.isfile('setup.py')
True
>>> os.path.isfile('/home')
False
>>> os.path.isfile('nonexistentfile')
False
Using pathlib on *nix:
>>> from pathlib import Path
>>> Path('setup.py').is_file()
True
>>> Path('/home').is_file()
False
>>> Path('nonexistentfile').is_file()
False
Checking if a path is a directory: 检查一个路径是否是目录。
Using os.path on *nix:
>>> import os
>>> os.path.isdir('/')
True
>>> os.path.isdir('setup.py')
False
>>> os.path.isdir('/spam')
False
Using pathlib on *nix:
>>> from pathlib import Path
>>> Path('/').is_dir()
True
>>> Path('setup.py').is_dir()
False
>>> Path('/spam').is_dir()
False
查找文件大小和文件夹内容
Finding File Sizes and Folder Contents
Getting a file's size in bytes: 获取一个文件的大小,单位为字节
Using os.path on Windows:
>>> import os
>>> os.path.getsize('C:\\Windows\\System32\\calc.exe')
776192
Using pathlib on *nix:
>>> from pathlib import Path
>>> stat = Path('/bin/python3.6').stat()
>>> print(stat) # stat contains some other information about the file as well
os.stat_result(st_mode=33261, st_ino=141087, st_dev=2051, st_nlink=2, st_uid=0,
--snip--
st_gid=0, st_size=10024, st_atime=1517725562, st_mtime=1515119809, st_ctime=1517261276)
>>> print(stat.st_size) # size in bytes
10024
Listing directory contents using os.listdir on Windows: 在Windows中使用os.listdir列出目录内容。
>>> import os
>>> os.listdir('C:\\Windows\\System32')
['0409', '12520437.cpx', '12520850.cpx', '5U877.ax', 'aaclient.dll',
--snip--
'xwtpdui.dll', 'xwtpw32.dll', 'zh-CN', 'zh-HK', 'zh-TW', 'zipfldr.dll']
Listing directory contents using pathlib on *nix: 在*nix上使用pathlib列出目录内容。
>>> from pathlib import Path
>>> for f in Path('/usr/bin').iterdir():
>>>     print(f)
...
/usr/bin/tiff2rgba
/usr/bin/iconv
/usr/bin/ldd
/usr/bin/cache_restore
/usr/bin/udiskie
/usr/bin/unix2dos
/usr/bin/t1reencode
/usr/bin/epstopdf
/usr/bin/idle3
...
To find the total size of all the files in this directory: 要找到这个目录中所有文件的总大小
WARNING: Directories themselves also have a size! So you might want to check for whether a path is a file or directory using the methods in the methods discussed in the above section! 警告: 目录本身也有一个大小! 所以你可能需要使用上节中讨论的方法来检查一个路径是文件还是目录!
Using os.path.getsize() and os.listdir() together on Windows: 在 Windows 中使用 os.path.getsize() 和 os.listdir() 一起使用。
>>> import os
>>> total_size = 0

>>> for filename in os.listdir('C:\\Windows\\System32'):
    total_size = total_size + os.path.getsize(os.path.join('C:\\Windows\\System32', filename))

>>> print(total_size)
1117846456
Using pathlib on \*nix:

>>> from pathlib import Path
>>> total_size = 0

>>> for sub_path in Path('/usr/bin').iterdir():
...     total_size += sub_path.stat().st_size
>>>
>>> print(total_size)
1903178911
拷贝文件和文件夹
Copying Files and Folders
The shutil module provides functions for copying files, as well as entire folders. shutil模块提供了复制文件以及整个文件夹的功能。
>>> import shutil, os
>>> os.chdir('C:\\')
>>> shutil.copy('C:\\spam.txt', 'C:\\delicious') 'C:\\delicious\\spam.txt'>>> shutil.copy('eggs.txt', 'C:\\delicious\\eggs2.txt') 'C:\\delicious\\eggs2.txt'
While shutil.copy() will copy a single file, shutil.copytree() will copy an entire folder and every folder and file contained in it: shutil.copy()将复制单个文件,而shutil.copytree()将复制整个文件夹及其中的每个文件夹和文件。
>>> import shutil, os
>>> os.chdir('C:\\')
>>> shutil.copytree('C:\\bacon', 'C:\\bacon_backup') 'C:\\bacon_backup'
移动和重命名文件夹
Moving and Renaming Files and Folders
>>> import shutil
>>> shutil.move('C:\\bacon.txt', 'C:\\eggs')
'C:\\eggs\\bacon.txt'
The destination path can also specify a filename. In the following example, the source file is moved and renamed: 目标路径也可以指定一个文件名。在下面的例子中,源文件被移动并重命名。
>>> shutil.move('C:\\bacon.txt', 'C:\\eggs\\new_bacon.txt')
'C:\\eggs\\new_bacon.txt'
If there is no eggs folder, then move() will rename bacon.txt to a file named eggs. 如果没有 eggs 文件夹,那么 moving() 会将 bacon.txt 重命名为 eggs 文件。
>>> shutil.move('C:\\bacon.txt', 'C:\\eggs')
'C:\\eggs'
永久删除文件和文件夹
Permanently Deleting Files and Folders
- Calling os.unlink(path) or Path.unlink() will delete the file at path.
- Calling os.rmdir(path) or Path.rmdir() will delete the folder at path. This folder must be empty of any files or folders.
- Calling shutil.rmtree(path) will remove the folder at path, and all files and folders it contains will also be deleted.
- 调用 os.unlink(path) 或 Path.unlink() 会删除路径上的文件。
- 调用 os.rmdir(path) 或 Path.rmdir() 会删除路径上的文件夹。这个文件夹必须是没有任何其他文件或文件夹。
- 调用 shutil.rmtree(path)将删除路径处的文件夹,同时它所包含的所有文件和文件夹也将被删除。
用 send2trash 模块安全删除
Safe Deletes with the send2trash Module
You can install this module by running pip install send2trash from a Terminal window. 你可以通过在终端窗口中运行 pip install send2trash 来安装这个模块。
>>> import send2trash>>> with open('bacon.txt', 'a') as bacon_file: # creates the file ... bacon_file.write('Bacon is not a vegetable.') 25>>> send2trash.send2trash('bacon.txt')
遍历目录树
Walking a Directory Tree
>>> import os
>>>
>>> for folder_name, subfolders, filenames in os.walk('C:\\delicious'):
>>>     print('The current folder is {}'.format(folder_name))
>>>
>>>     for subfolder in subfolders:
>>>         print('SUBFOLDER OF {}: {}'.format(folder_name, subfolder))
>>>     for filename in filenames:
>>>         print('FILE INSIDE {}: {}'.format(folder_name, filename))
>>>
>>>     print('')
The current folder is C:\delicious
SUBFOLDER OF C:\delicious: cats
SUBFOLDER OF C:\delicious: walnut
FILE INSIDE C:\delicious: spam.txt
The current folder is C:deliciouscats FILE INSIDE C:deliciouscats: catnames.txt FILE INSIDE C:deliciouscats: zophie.jpg
The current folder is C:deliciouswalnut SUBFOLDER OF C:deliciouswalnut: waffles
The current folder is C:deliciouswalnutwaffles FILE INSIDE C:deliciouswalnutwaffles: butter.txt
pathlib provides a lot more functionality than the ones listed above, like getting file name, getting file extension, reading/writing a file without manually opening it, etc. Check out the official documentation if you want to know more!
pathlib提供了比上面列出的更多的功能,比如获取文件名、获取文件扩展名、读取/写入文件而不需要手动打开等。如果你想了解更多,请查看官方文档。
读写文件
Reading and Writing Files
文件读写的过程
The File Reading/Writing Process To read/write to a file in Python, you will want to use the with statement, which will close the file for you after you are done.
要在Python中读/写到一个文件,你会想使用with语句,它将在你完成后为你关闭文件。
Opening and reading files with the open() function 用open()函数打开和读取文件
>>> with open('C:\\Users\\your_home_folder\\hello.txt') as hello_file:
...     hello_content = hello_file.read()
>>> hello_content
'Hello World!'
>>> # Alternatively, you can use the *readlines()* method to get a list of string values from the file, one string for each line of text:>>> with open('sonnet29.txt') as sonnet_file: ... sonnet_file.readlines() [When, in disgrace with fortune and men's eyes,\n', ' I all alone beweep my outcast state,\n', And trouble deaf heaven with my bootless cries,\n', And look upon myself and curse my fate,']>>> # You can also iterate through the file line by line: >>> with open('sonnet29.txt') as sonnet_file: ... for line in sonnet_file: # note the new line character will be included in the line ... print(line, end='')When, in disgrace with fortune and men's eyes, I all alone beweep my outcast state, And trouble deaf heaven with my bootless cries, And look upon myself and curse my fate,
写入文件
Writing to Files
>>> with open('bacon.txt', 'w') as bacon_file:
...     bacon_file.write('Hello world!\n')
13
>>> with open('bacon.txt', 'a') as bacon_file: ... bacon_file.write('Bacon is not a vegetable.') 25>>> with open('bacon.txt') as bacon_file: ... content = bacon_file.read()>>> print(content) Hello world! Bacon is not a vegetable.
使用 shelve 模块保存变量
Saving Variables with the shelve Module
To save variables: 保存变量
>>> import shelve>>> cats = ['Zophie', 'Pooka', 'Simon'] >>> with shelve.open('mydata') as shelf_file: ... shelf_file['cats'] = cats
To open and read variables: 打开和读取变量
>>> with shelve.open('mydata') as shelf_file:
...     print(type(shelf_file))
...     print(shelf_file['cats'])
<class 'shelve.DbfilenameShelf'>
['Zophie', 'Pooka', 'Simon']
Just like dictionaries, shelf values have keys() and values() methods that will return list-like values of the keys and values in the shelf.
Since these methods return list-like values instead of true lists, you should pass them to the list() function to get them in list form.
就像字典一样,shelf 值有 keys() 和 values() 方法,这些方法将返回 shelf 中的键和值的类似列表的值。 由于这些方法返回的是类似列表的值,而不是真正的列表,所以你应该把它们传给 list()函数,以列表形式获取它们。
>>> with shelve.open('mydata') as shelf_file:
...     print(list(shelf_file.keys()))
...     print(list(shelf_file.values()))
['cats']
[['Zophie', 'Pooka', 'Simon']]
用 pprint.pformat() 函数保存变量
Saving Variables with the pprint.pformat() Function
>>> import pprint>>> cats = [{'name': 'Zophie', 'desc': 'chubby'}, {'name': 'Pooka', 'desc': 'fluffy'}]>>> pprint.pformat(cats) "[{'desc': 'chubby', 'name': 'Zophie'}, {'desc': 'fluffy', 'name': 'Pooka'}]">>> with open('myCats.py', 'w') as file_obj: ... file_obj.write('cats = {}\n'.format(pprint.pformat(cats))) 83
读取 ZIP 文件
Reading ZIP Files
>>> import zipfile, os>>> os.chdir('C:\\') # move to the folder with example.zip >>> with zipfile.ZipFile('example.zip') as example_zip: ... print(example_zip.namelist()) ... spam_info = example_zip.getinfo('spam.txt') ... print(spam_info.file_size) ... print(spam_info.compress_size) ... print('Compressed file is %sx smaller!' % (round(spam_info.file_size / spam_info.compress_size, 2)))['spam.txt', 'cats/', 'cats/catnames.txt', 'cats/zophie.jpg'] 13908 3828 'Compressed file is 3.63x smaller!'
从 ZIP 文件中提取
Extracting from ZIP Files
The extractall() method for ZipFile objects extracts all the files and folders from a ZIP file into the current working directory.
ZipFile对象的 extractall() 方法将 ZIP 文件中的所有文件和文件夹提取到当前工作目录中。
>>> import zipfile, os>>> os.chdir('C:\\') # move to the folder with example.zip>>> with zipfile.ZipFile('example.zip') as example_zip: ... example_zip.extractall()
The extract() method for ZipFile objects will extract a single file from the ZIP file. Continue the interactive shell example:
ZipFile对象的extract()方法将从ZIP文件中提取单个文件。
>>> with zipfile.ZipFile('example.zip') as example_zip:
...     print(example_zip.extract('spam.txt'))
...     print(example_zip.extract('spam.txt', 'C:\\some\\new\\folders'))
'C:\\spam.txt'
'C:\\some\\new\\folders\\spam.txt'
创建和添加 ZIP 文件
Creating and Adding to ZIP Files
>>> import zipfile>>> with zipfile.ZipFile('new.zip', 'w') as new_zip: ... new_zip.write('spam.txt', compress_type=zipfile.ZIP_DEFLATED)
This code will create a new ZIP file named new.zip that has the compressed contents of spam.txt. 上述将创建一个新的 ZIP 文件,命名为 new.zip,里面有 spam.txt 的压缩内容。
JSON, YAML 和配置文件
JSON, YAML and configuration files
JSON
Open a JSON file with:
import json
with open("filename.json", "r") as f:
    content = json.loads(f.read())
Write a JSON file with:
import json

content = {"name": "Joe", "age": 20}
with open("filename.json", "w") as f:
    f.write(json.dumps(content, indent=2))
YAML
Compared to JSON, YAML allows a much better humain maintainance and gives ability to add comments. It is a convinient choice for configuration files where human will have to edit.
与JSON相比,YAML允许更好的维护和添加注释。它是一个很有说服力的选择,因为人必须要编辑配置文件。
There are two main librairies allowing to access to YAML files: 有两个主要的库
- PyYaml
- Ruamel.yaml
Install them using pip install in your virtual environment. 在你的 virtual environment 中用 pip 安装它们
The first one it easier to use but the second one, Ruamel, implements much better the YAML specification, and allow for example to modify a YAML content without altering comments.
前者更容易使用,但后者,Ruamel,实现了更好的YAML规范,并允许修改YAML内容而不改变注释。
Open a YAML file with:
from ruamel.yaml import YAML

with open("filename.yaml") as f:
    yaml=YAML()
    yaml.load(f)
Anyconfig
Anyconfig is a very handy package allowing to abstract completly the underlying configuration file format. It allows to load a Python dictionary from JSON, YAML, TOML, and so on.
Anyconfig是一个非常方便的包,它可以完全抽象出底层的配置文件格式。它允许从JSON、YAML、TOML等中加载一个Python字典。
Install it with pip install anyconfig
Usage:
import anyconfig

conf1 = anyconfig.load("/path/to/foo/conf.d/a.yml")
Debugging 调试
抛出异常
Raising Exceptions Exceptions are raised with a raise statement. In code, a raise statement consists of the following:
异常是用 raise 语句抛出的。在代码中,一个 raise 语句包括以下内容
The raise keyword
A call to the Exception() function
A string with a helpful error message passed to the Exception() function
raise 关键字
对Exception()函数的调用
传给Exception()函数的错误信息字符串
>>> raise Exception('This is the error message.')
Traceback (most recent call last):
File "<pyshell#191>", line 1, in <module>
    raise Exception('This is the error message.')
Exception: This is the error message.
Often it’s the code that calls the function, not the function itself, that knows how to handle an expection. So you will commonly see a raise statement inside a function and the try and except statements in the code calling the function.
通常是调用函数的代码,而不是函数本身知道如何处理期望值。所以你通常会在函数内部看到一个 raise 语句, 而在调用函数的代码中会看到 try 和 except 语句。
def box_print(symbol, width, height):
    if len(symbol) != 1:
        raise Exception('Symbol must be a single character string.')
    if width <= 2:
        raise Exception('Width must be greater than 2.')
    if height <= 2:
        raise Exception('Height must be greater than 2.')
    print(symbol * width)

    for i in range(height - 2):
        print(symbol + (' ' * (width - 2)) + symbol)
    print(symbol * width)

for sym, w, h in (('*', 4, 4), ('O', 20, 5), ('x', 1, 3), ('ZZ', 3, 3)):
    try:
        box_print(sym, w, h)
    except Exception as err:
        print('An exception happened: ' + str(err))
以字符串的形式获取回溯信息
Getting the Traceback as a String The traceback is displayed by Python whenever a raised exception goes unhandled. But can also obtain it as a string by calling traceback.format_exc(). This function is useful if you want the information from an exception’s traceback but also want an except statement to gracefully handle the exception. You will need to import Python’s traceback module before calling this function.
每当一个提出的异常未被处理时,Python就会显示 traceback。但也可以通过调用 traceback.format_exc() 来获取它的字符串。如果你想从异常的traceback中获得信息,但又想用except语句来优雅地处理异常,这个函数就很有用。 在调用这个函数之前,你需要先导入Python的traceback模块。
>>> import traceback>>> try: >>> raise Exception('This is the error message.') >>> except: >>> with open('errorInfo.txt', 'w') as error_file: >>> error_file.write(traceback.format_exc()) >>> print('The traceback info was written to errorInfo.txt.') 116
The traceback info was written to errorInfo.txt. The 116 is the return value from the write() method, since 116 characters were written to the file. The traceback text was written to errorInfo.txt.
回溯信息被写到 errorInfo.txt。 116是write()方法的返回值,因为116个字符被写到了文件中。回溯文本被写到了 errorInfo.txt。
Traceback (most recent call last): File "<pyshell#28>", line 2, in <module> Exception: This is the error message.
Assertions 断言
An assertion is a sanity check to make sure your code isn’t doing something obviously wrong. These sanity checks are performed by assert statements. If the sanity check fails, then an AssertionError exception is raised. In code, an assert statement consists of the following:
断言是一种理智检查,确保你的代码没有做明显错误的事情。这些验证性检查是通过 assert 语句来执行的。 如果安全性检查失败,那么就会产生一个 AssertionError 异常。在代码中,一个 assert 语句包括以下内容。
The assert keyword
A condition (that is, an expression that evaluates to True or False)
A comma
A string to display when the condition is False
assert 关键字
一个条件(即评价为True或False的表达式)。
逗号
条件为 False 时显示的字符串
>>> pod_bay_door_status = 'open'
>>> assert pod_bay_door_status == 'open', 'The pod bay doors need to be "open".'
>>> pod_bay_door_status = 'I\'m sorry, Dave. I\'m afraid I can\'t do that.'
>>> assert pod_bay_door_status == 'open', 'The pod bay doors need to be "open".'
Traceback (most recent call last): File "<pyshell#10>", line 1, in <module> assert pod_bay_door_status == 'open', 'The pod bay doors need to be "open".' AssertionError: The pod bay doors need to be "open".
In plain English, an assert statement says, “I assert that this condition holds true, and if not, there is a bug somewhere in the program.” Unlike exceptions, your code should not handle assert statements with try and except; if an assert fails, your program should crash. By failing fast like this, you shorten the time between the original cause of the bug and when you first notice the bug. This will reduce the amount of code you will have to check before finding the code that’s causing the bug.
用通俗的英语来说,assert语句是这样说的:"我断言这个条件成立,如果不成立,那么程序中的某个地方就有一个bug。" 与异常不同,你的代码不应该用 try 和 except 来处理 assert 语句;如果assert失败,你的程序就应该崩溃。 通过像这样快速失败,你可以缩短从最初的 bug 原因到你第一次注意到 bug 时的时间。 这将减少你在找到导致bug的代码之前需要检查的代码量。
Disabling Assertions 取消断言
Assertions can be disabled by passing the -O option when running Python. 运行Python时,可以通过传递-O选项来禁用断言。
Logging 日志
To enable the logging module to display log messages on your screen as your program runs, copy the following to the top of your program (but under the #! python shebang line):
要启用日志模块在程序运行时在屏幕上显示日志信息,请将下面的内容复制到程序顶部 (但在 #! python 行下)。
import logging

logging.basicConfig(level=logging.DEBUG, format=' %(asctime)s - %(levelname)s- %(message)s')
Say you wrote a function to calculate the factorial of a number. In mathematics, factorial 4 is 1 × 2 × 3 × 4, or 24. Factorial 7 is 1 × 2 × 3 × 4 × 5 × 6 × 7, or 5,040. Open a new file editor window and enter the following code. It has a bug in it, but you will also enter several log messages to help yourself figure out what is going wrong. Save the program as factorialLog.py.
假设你写了一个函数来计算一个数的阶乘。在数学中,阶乘4 是1×2×3×4,即24。 阶乘7是1×2×3×4×5×6×7,即5040。 打开一个新的文件编辑器窗口,输入下面的代码。这里面有一个bug,但也会输入几个日志信息, 帮助自己弄清楚到底是怎么回事。将程序保存为factorialLog.py。
>>> import logging
>>>
>>> logging.basicConfig(level=logging.DEBUG, format=' %(asctime)s - %(levelname)s- %(message)s')
>>>
>>> logging.debug('Start of program')
>>>
>>> def factorial(n):
>>>
>>>     logging.debug('Start of factorial(%s)' % (n))
>>>     total = 1
>>>
>>>     for i in range(1, n + 1):
>>>         total *= i
>>>         logging.debug('i is ' + str(i) + ', total is ' + str(total))
>>>
>>>     logging.debug('End of factorial(%s)' % (n))
>>>
>>>     return total
>>>
>>> print(factorial(5))
>>> logging.debug('End of program')
2015-05-23 16:20:12,664 - DEBUG - Start of program
2015-05-23 16:20:12,664 - DEBUG - Start of factorial(5)
2015-05-23 16:20:12,665 - DEBUG - i is 0, total is 0
2015-05-23 16:20:12,668 - DEBUG - i is 1, total is 0
2015-05-23 16:20:12,670 - DEBUG - i is 2, total is 0
2015-05-23 16:20:12,673 - DEBUG - i is 3, total is 0
2015-05-23 16:20:12,675 - DEBUG - i is 4, total is 0
2015-05-23 16:20:12,678 - DEBUG - i is 5, total is 0
2015-05-23 16:20:12,680 - DEBUG - End of factorial(5)
0
2015-05-23 16:20:12,684 - DEBUG - End of program
Logging Levels 日志级别
Logging levels provide a way to categorize your log messages by importance. There are five logging levels, described in Table 10-1 from least to most important. Messages can be logged at each level using a different logging function.
日志级别提供了一种按重要性对日志信息进行分类的方法。 有五个日志级别,从最不重要到最重要,如表 10-1 所述。每个级别的日志信息可以使用不同的日志功能来记录。
Level Logging Function Description DEBUG logging.debug() The lowest level. Used for small details. Usually you care about these messages only when diagnosing problems. INFO logging.info() Used to record information on general events in your program or confirm that things are working at their point in the program. WARNING logging.warning() Used to indicate a potential problem that doesn’t prevent the program from working but might do so in the future. ERROR logging.error() Used to record an error that caused the program to fail to do something. CRITICAL logging.critical() The highest level. Used to indicate a fatal error that has caused or is about to cause the program to stop running entirely.
Disabling Logging 取消日志
After you’ve debugged your program, you probably don’t want all these log messages cluttering the screen. The logging.disable() function disables these so that you don’t have to go into your program and remove all the logging calls by hand.
在你调试完程序后,你可能不希望这些日志消息弄得满屏都是。 logging.disable()函数可以禁用这些日志信息,这样你就不需要进入你的程序并手动删除所有的日志调用。
>>> import logging>>> logging.basicConfig(level=logging.INFO, format=' %(asctime)s -%(levelname)s - %(message)s')>>> logging.critical('Critical error! Critical error!') 2015-05-22 11:10:48,054 - CRITICAL - Critical error! Critical error!>>> logging.disable(logging.CRITICAL)>>> logging.critical('Critical error! Critical error!')>>> logging.error('Error! Error!')
Logging to a File 日志到文件中
Instead of displaying the log messages to the screen, you can write them to a text file. The logging.basicConfig() function takes a filename keyword argument, like so:
可以不将日志消息显示到屏幕上,而是写到一个文本文件中。logging.basicConfig() 函数需要一个文件名关键字参数,就像这样。
import logging
logging.basicConfig(filename='myProgramLog.txt', level=logging.DEBUG, format='%(asctime)s - %(levelname)s - %(message)s')
Lambda Functions Lambda 函数
This function: 这个函数
>>> def add(x, y):
        return x + y
>>> add(5, 3) 8
Is equivalent to the lambda function: 相当于 lambda 函数
>>> add = lambda x, y: x + y
>>> add(5, 3)
8
It's not even need to bind it to a name like add before: 甚至不需要绑定到名字上
>>> (lambda x, y: x + y)(5, 3)
8
Like regular nested functions, lambdas also work as lexical closures: 和普通的嵌套函数一样,lambdas也可以像 词性闭合函数 一样工作。
>>> def make_adder(n):
        return lambda x: x + n
>>> plus_3 = make_adder(3) >>> plus_5 = make_adder(5)>>> plus_3(4) 7 >>> plus_5(4) 9
Note: lambda can only evaluate an expression, like a single line of code. 注意:lambda只能 evaluate 一个表达式,就像是单行代码一样。
Ternary Conditional Operator 三元运算符
Many programming languages have a ternary operator, which define a conditional expression. The most common usage is to make a terse simple conditional assignment statement. In other words, it offers one-line code to evaluate the first expression if the condition is true, otherwise it evaluates the second expression.
许多编程语言都有一个三元运算符,它定义了一个条件表达式。最常见的用法是做一个简单的条件赋值语句。 换句话说,它提供了单行代码,如果条件为真,它就对第一个表达式进行评价,否则就对第二个表达式进行评价。
<expression1> if <condition> else <expression2>
Example:
>>> age = 15>>> print('kid' if age < 18 else 'adult') kid
Ternary operators can be chained: 三元运算符可以链式使用
>>> age = 15>>> print('kid' if age < 13 else 'teenager' if age < 18 else 'adult') teenager
The code above is equivalent to: 以上代码相当于
- if age < 18:
- if age < 13:
- print('kid')
- else:
- print('teenager')
- else:
- print('adult')
args and kwargs
The names args and kwargs are arbitrary - the important thing are the * and ** operators. They can mean: args 和 kwargs 的名字不重要--重要的是 * 和 ** 操作符。它们的意思是:
- In a function declaration, * means “pack all remaining positional arguments into a tuple named <name>”, while ** is the same for keyword arguments (except it uses a dictionary, not a tuple).
- In a function call, * means “unpack tuple or list named <name> to positional arguments at this position”, while ** is the same for keyword arguments.
- 在函数声明中,* 表示 "将所有剩余的位置参数 打包 成一个名为 <name> 的tuple",而**对于关键字参数来说是一样的(只是它使用的是字典,而不是tuple)。
- 在函数调用中,* 的意思是 "将名为 <name> 的 tuple 或列表 解包 为这个位置的位置参数",而**对于关键字参数也是一样的。
For example you can make a function that you can use to call any other function, no matter what parameters it has:
比如你可以做一个函数,不管它有什么参数,都可以用来调用任何其他函数。
def forward(f, *args, \*\*kwargs):
    return f(*args, \*\*kwargs)
Inside forward, args is a tuple (of all positional arguments except the first one, because we specified it - the f), kwargs is a dict. Then we call f and unpack them so they become normal arguments to f.
在 forward 这个转发函数里面,args 是一个元组(除了第一个参数以外的所有位置参数,因为我们指定了第一个参数--f), kwargs 是一个 dict。然后我们调用 f,并将其解包,使其成为 f 的正常参数。
You use *args when you have an indefinite amount of positional arguments. 当 不确定 位置参数数量时,你可以使用 *args。
>>> def fruits(*args):
>>>    for fruit in args:
>>>       print(fruit)

>>> fruits("apples", "bananas", "grapes")

"apples"
"bananas"
"grapes"
Similarly, you use **kwargs when you have an indefinite number of keyword arguments. 同样,当 不确定 位置参数数量时,你也可以使用 **kwargs。
>>> def fruit(\*\*kwargs):
>>>    for key, value in kwargs.items():
>>>        print("{0}: {1}".format(key, value))

>>> fruit(name = "apple", color = "red")

name: apple
color: red
>>> def show(arg1, arg2, *args, kwarg1=None, kwarg2=None, \*\*kwargs):
>>>   print(arg1)
>>>   print(arg2)
>>>   print(args)
>>>   print(kwarg1)
>>>   print(kwarg2)
>>>   print(kwargs)

>>> data1 = [1,2,3]
>>> data2 = [4,5,6]
>>> data3 = {'a':7,'b':8,'c':9}

>>> show(*data1,*data2, kwarg1="python",kwarg2="cheatsheet",**data3)
1
2
(3, 4, 5, 6)
python
cheatsheet
{'a': 7, 'b': 8, 'c': 9}

>>> show(*data1, *data2, **data3)
1
2
(3, 4, 5, 6)
None
None
{'a': 7, 'b': 8, 'c': 9}

# If you do not specify ** for kwargs
>>> show(*data1, *data2, *data3)
1
2
(3, 4, 5, 6, "a", "b", "c")
None
None
{}
Things to Remember(args)
- Functions can accept a variable number of positional arguments by using *args in the def statement.
- You can use the items from a sequence as the positional arguments for a function with the * operator.
- Using the * operator with a generator may cause your program to run out of memory and crash.
- Adding new positional parameters to functions that accept *args can introduce hard-to-find bugs.
- 通过在def语句中使用 *args,函数可以接受可变数量的位置参数。
- 可以使用 * 运算符将序列中的项作为函数的位置参数。
- 如果使用 * 操作符与生成器一起使用,可能会导致程序耗尽内存并崩溃。
- 在接受 *args 的函数中添加新的位置参数可能会引入难以发现的bug。
Things to Remember(kwargs)
- Function arguments can be specified by position or by keyword.
- Keywords make it clear what the purpose of each argument is when it would be confusing with only positional arguments.
- Keyword arguments with default values make it easy to add new behaviors to a function, especially when the function has existing callers.
- Optional keyword arguments should always be passed by keyword instead of by position.
- 函数参数可以通过位置或关键字来指定。
- 当只用位置参数会让人感到困惑的时候,关键字可以让人清楚地知道每个参数的目的是什么。
- 带有缺省值的关键字参数可以很容易地给函数添加新的行为,特别是当函数有现有的调用者时。
- 可选的关键字参数应始终按关键字而不是按位置传递。
Context Manager 上下文管理器
While Python's context managers are widely used, few understand the purpose behind their use. These statements, commonly used with reading and writing files, assist the application in conserving system memory and improve resource management by ensuring specific resources are only in use for certain processes.
虽然Python的上下文管理器被广泛使用,但很少有人了解其使用的目的。这些常用于读写文件的语句, 通过确保特定的资源只用于特定的进程,帮助应用程序节约系统内存,改善资源管理。
with statement with 语句
A context manager is an object that is notified when a context (a block of code) starts and ends. You commonly use one with the with statement. It takes care of the notifying.
上下文管理器是一个对象,当一个上下文(代码块)开始和结束时,会被通知的对象。你通常用一个与语句一起使用。 它承担着通知的任务。
For example, file objects are context managers. When a context ends, the file object is closed automatically:
例如,文件对象就是上下文管理器。当上下文结束时,文件对象自动关闭。
>>> with open(filename) as f:
>>>     file_contents = f.read()

# the open_file object has automatically been closed.
Anything that ends execution of the block causes the context manager's exit method to be called. This includes exceptions, and can be useful when an error causes you to prematurely exit from an open file or connection. Exiting a script without properly closing files/connections is a bad idea, that may cause data loss or other problems. By using a context manager you can ensure that precautions are always taken to prevent damage or loss in this way.
任何结束块的执行都会导致上下文管理器的退出方法被调用。这包括异常,当错误导致你过早地从打开的文件或连接中退出时,这可能是有用的。 在没有正确关闭文件/连接的情况下退出脚本是个坏主意,这可能会导致数据丢失或其他问题。 通过使用上下文管理器,你可以确保始终采取预防措施,以防止这种方式的损坏或丢失。
用生成器语法编写自己的上下文管理器
Writing your own contextmanager using generator syntax
It is also possible to write a context manager using generator syntax thanks to the contextlib.contextmanager decorator:
也可以使用contextlib.contextmanager decorator来编写一个上下文管理器。
>>> import contextlib
>>> @contextlib.contextmanager
... def context_manager(num):
...     print('Enter')
...     yield num + 1
...     print('Exit')
>>> with context_manager(2) as cm:
...     # the following instructions are run when the 'yield' point of the context
...     # manager is reached.
...     # 'cm' will have the value that was yielded
...     print('Right in the middle with cm = {}'.format(cm))
Enter
Right in the middle with cm = 3
Exit
__main__ 顶层脚本环境
__main__ Top-level script environment
__main__ is the name of the scope in which top-level code executes. A module’s name is set equal to __main__ when read from standard input, a script, or from an interactive prompt.
__main__ 是执行顶层代码的作用域的名称。当从标准输入、脚本或交互式提示符读取模块的名称时, 模块的名称被设置为 __main__。
A module can discover whether or not it is running in the main scope by checking its own __name__, which allows a common idiom for conditionally executing code in a module when it is run as a script or with python -m but not when it is imported:
一个模块可以通过检查它自己的 __name__ 来发现它是否在 主作用域 中运行,当它作为脚本或用 python -m 运行时, 可以有条件地执行模块中的代码,但当它被导入时,则不需要。
>>> if \_\_name\_\_ == "\_\_main\_\_":
...     # execute only if run as a script
...     main()
For a package, the same effect can be achieved by including a main.py module, the contents of which will be executed when the module is run with -m
对于一个包,可以通过引入 一个 main.py 模块来实现同样的效果,其中的内容将在模块用 -m 运行时执行。
For example we are developing script which is designed to be used as module, we should do: 例如,如果我们正在开发的脚本是作为模块使用的,我们应该这样做
>>> # Python program to execute function directly
>>> def add(a, b):
...     return a+b
...
>>> add(10, 20) # we can test it by calling the function save it as calculate.py
30
>>> # Now if we want to use that module by importing we have to comment out our call,
>>> # Instead we can write like this in calculate.py
>>> if \_\_name\_\_ == "\_\_main\_\_":
...     add(3, 5)
...
>>> import calculate
>>> calculate.add(3, 5)
8
Advantages 好处
Every Python module has it’s __name__ defined and if this is __main__, it implies that the module is being run standalone by the user and we can do corresponding appropriate actions.
每个Python模块都定义了它的 __name__,如果这个名字是__main__,则意味着该模块被用户独立运行,我们可以做相应的操作。
If you import this script as a module in another script, the name is set to the name of the script/module.
如果你把这个脚本作为一个模块导入到另一个脚本中,那么这个名字会被设置为脚本/模块的名字。
Python files can act as either reusable modules, or as standalone programs.
Python 文件既可以作为可重用的模块,也可以作为独立的程序。
if __name__ == "main": is used to execute some code only if the file was run directly, and not imported.
if __name__ == “main” 的用处是:仅在文件直接运行时才用于执行一些代码,而不是导入的时候。
setup.py
The setup script is the centre of all activity in building, distributing, and installing modules using the Distutils. The main purpose of the setup script is to describe your module distribution to the Distutils, so that the various commands that operate on your modules do the right thing.
setup 脚本是使用 Distutils 构建、分发和安装模块的中心。setup 脚本的主要目的是向 Distutils 描述你的模块分布情况,以便在模块上运行的各种命令能够正确地执行。
The setup.py file is at the heart of a Python project. It describes all of the metadata about your project. There a quite a few fields you can add to a project to give it a rich set of metadata describing the project. However, there are only three required fields: name, version, and packages. The name field must be unique if you wish to publish your package on the Python Package Index (PyPI). The version field keeps track of different releases of the project. The packages field describes where you’ve put the Python source code within your project.
setup.py 文件是一个 Python 项目的核心。它描述了关于你的项目的所有元数据。 有很多字段可以被添加到项目中,以便为项目提供丰富的元数据描述。 但是,只有三个需要的字段:名称、版本和包。如果你想在 Python 包索引 (PyPI) 上发布你的包,名称字段必须是唯一的。 版本字段记录了项目的不同版本。package 字段描述了你将 Python 源代码放在项目中的位置。
This allows you to easily install Python packages. Often it's enough to write: 这样你就可以轻松地安装Python包。通常情况下,只需编写
python setup.py install
and module will install itself. 模块就会安装自己。
Our initial setup.py will also include information about the license and will re-use the README.txt file for the long_description field. This will look like:
我们的初始的 setup.py 也将包含关于许可证的信息,并将复用 readme.txt 文件内容作为 long_description 字段。 这将看起来像:
>>> from distutils.core import setup
>>> setup(
...    name='pythonCheatsheet',
...    version='0.1',
...    packages=['pipenv',],
...    license='MIT',
...    long_description=open('README.txt').read(),
... )
Find more information visit http://docs.python.org/install/index.html.
Dataclasses 数据类
Dataclasses are python classes but are suited for storing data objects. This module provides a decorator and functions for automatically adding generated special methods such as __init__() and __repr__() to user-defined classes.
Dataclasses是python类,但适合于存储数据对象。该模块提供了一个装饰器和函数, 用于自动添加生成的特殊方法,如在 用户定义的类 的 __init__()和__repr__()等。
Features 特性
They store data and represent a certain data type. Ex: A number. For people familiar with ORMs, a model instance is a data object. It represents a specific kind of entity. It holds attributes that define or represent the entity.
它们存储数据,并代表一定的数据类型。例如:一个数字。对于熟悉ORM的人来说, 模型实例就是一个数据对象。它代表了一种特定的实体。它持有定义或表示该实体的属性。
They can be compared to other objects of the same type. Ex: A number can be greater than, less than, or equal to another number.
它们可以与其他同类型的对象进行比较。例如:一个数字可以大于、小于或等于另一个数字。
Python 3.7 provides a decorator dataclass that is used to convert a class into a dataclass.
Python 3.7 提供了一个decorateator dataclass,用于将类转换为 dataclass。
python 2.7
>>> class Number:
...     def \_\_init\_\_(self, val):
...         self.val = val
...
>>> obj = Number(2)
>>> obj.val
2
with dataclass
>>> @dataclass
... class Number:
...     val: int
...
>>> obj = Number(2)
>>> obj.val
2
Default values 默认值
It is easy to add default values to the fields of your data class. 在数据类的字段中添加默认值很容易。
>>> @dataclass
... class Product:
...     name: str
...     count: int = 0
...     price: float = 0.0
...
>>> obj = Product("Python")
>>> obj.name
Python
>>> obj.count
0
>>> obj.price
0.0
Type hints 类型推导
It is mandatory to define the data type in dataclass. However, If you don't want specify the datatype then, use typing.Any.
>>> from dataclasses import dataclass
>>> from typing import Any

>>> @dataclass
... class WithoutExplicitTypes:
...    name: Any
...    value: Any = 42
...
Virtual Environment 虚拟环境
The use of a Virtual Environment is to test python code in encapsulated environments and to also avoid filling the base Python installation with libraries we might use for only one project.
使用虚拟环境是为了在封装的环境中测试Python代码, 同时也是为了避免在基本的Python安装中充斥着我们可能只在一个项目中使用的库。
virtualenv
1 Install virtualenv
pip install virtualenv
2 Install virtualenvwrapper-win (Windows)
pip install virtualenvwrapper-win
Usage:
1 Make a Virtual Environment
mkvirtualenv HelloWold
Anything we install now will be specific to this project. And available to the projects we connect to this environment. 我们现在安装的任何东西都将是这个项目所特有的。并提供给我们连接到这个环境的项目。
2 Set Project Directory
To bind our virtualenv with our current working directory we simply enter: 要将virtualenv与当前工作目录绑定,我们只需输入:
setprojectdir .
3 Deactivate
To move onto something else in the command line type ‘deactivate’ to deactivate your environment. 在命令行中输入 "deactivate "来停用你的环境。
deactivate
Notice how the parenthesis disappear.
4 Workon
Open up the command prompt and type ‘workon HelloWold’ to activate the environment and move into your root project folder 打开命令提示符,输入'workonHelloWold' 激活环境,并移动到你的根项目文件夹中。
workon HelloWold
poetry
Poetry is a tool for dependency management and packaging in Python. It allows you to declare the libraries your project depends on and it will manage (install/update) them for you.
Poetry是一个用于Python中的依赖管理和封装的工具。它允许你声明你的项目所依赖的库,并为你管理(安装/更新)它们。
1 Install Poetry
pip install --user poetry
2 Create a new project
poetry new my-project
This will create a my-project directory:
my-project
├── pyproject.toml
├── README.rst
├── poetry_demo
│   └── \_\_init\_\_.py
└── tests
    ├── \_\_init\_\_.py
    └── test_poetry_demo.py
The pyproject.toml file will orchestrate your project and its dependencies: pyproject.toml文件将协调你的项目及其依赖关系。
[tool.poetry]
name = "my-project"
version = "0.1.0"
description = ""
authors = ["your name <your@mail.com>"]

[tool.poetry.dependencies]
python = "*"

[tool.poetry.dev-dependencies]
pytest = "^3.4"
3 Packages
To add dependencies to your project, you can specify them in the tool.poetry.dependencies section: 要给你的项目添加依赖项,你可以在toolto.poetry.dependencies部分指定它们。
[tool.poetry.dependencies]
pendulum = "^1.4"
Also, instead of modifying the pyproject.toml file by hand, you can use the add command and it will automatically find a suitable version constraint. 另外,你可以用add命令来代替手工修改pyproject.toml文件,它会自动找到一个合适的版本约束。
$ poetry add pendulum
To install the dependencies listed in the pyproject.toml: 要安装 pyproject.toml 中列出的依赖项
$ poetry install
To remove dependencies: 移除依赖
poetry remove pendulum
For more information, check the documentation.
pipenv
Pipenv is a tool that aims to bring the best of all packaging worlds (bundler, composer, npm, cargo, yarn, etc.) to the Python world. Windows is a first-class citizen, in our world.
Pipenv是一个工具,它的目的是将全世界最好的东西(bundler、composer、npm、gassive、yarn等) 都带到Python世界。在我们的世界里Windows是一等公民。
1 Install pipenv
pip install pipenv
2 Enter your Project directory and install the Packages for your project
cd my_project
pipenv install <package>

Pipenv will install your package and create a Pipfile for you in your project’s directory. The Pipfile is used to track which dependencies your project needs in case you need to re-install them.
3 Uninstall Packages
pipenv uninstall <package>
4 Activate the Virtual Environment associated with your Python project
pipenv shell
5 Exit the Virtual Environment
exit
Find more information and a video in docs.pipenv.org.
anaconda
Anaconda is another popular tool to manage python packages. Anaconda是另一个流行的管理python包的工具。
Where packages, notebooks, projects and environments are shared. Your place for free public conda package hosting.
Usage:
1 Make a Virtual Environment
conda create -n HelloWorld
2 To use the Virtual Environment, activate it by:
conda activate HelloWorld
Anything installed now will be specific to the project HelloWorld 现在安装的所有东西都被限定在 HelloWorld 项目中
3 Exit the Virtual Environment
conda deactivate